
Zion National Park Guide: Packing List, Hikes, Weekend Trip Itinerary
In this Zion National Park Guide, I will share what we learned from our epic weekend exploring Zion National Park that you can keep in mind when planning your own trip to Zion. Including a packing list, the hikes that we did there, the tips that I learned from the experience, and our weekend trip itinerary.
Table of Contents Show
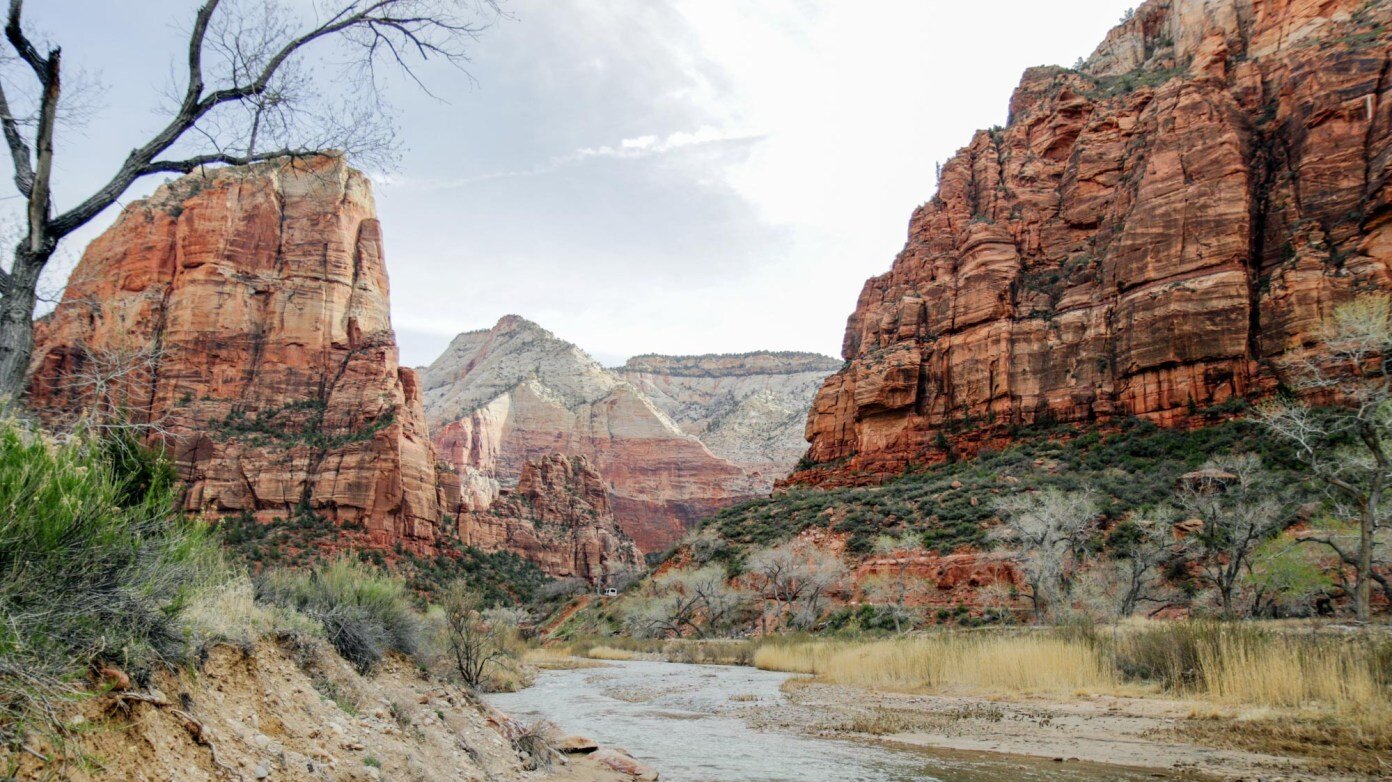
Zion National Park is like an alien landscape with its towering red canyons, weeping rocks, and incredible views. We only got a glimpse of its raw beauty when Peter and I stopped in Zion on our roadtrip to California. At that time we vowed we would return someday to further explore Zion’s natural wonders. For Easter, we knew that the long holiday weekend would provide the perfect opportunity to do just that.
For this trip, we joined up with the same group of friends that we explored Yosemite National Park with over Thanksgiving for another holiday weekend full of hiking. If you haven’t read the Yosemite Weekend Trip blog post make sure to check it out! May our adventures inspire your own trips to the beautiful National Parks.
This post contains affiliate links, which means that if you make a purchase through one of these links we will receive a small commission at no extra cost to you, helping to fund our future travels. For more information, read our Disclosures page.
What to Pack for a Trip to Zion
Depending on the intensity of the hiking you plan to do, the gear that you bring for your time in Zion will be extremely important. Those visiting the park that intend to utilize the paved walking trails and enjoy a more relaxed visit should be fine with a pair of comfortable walking shoes. While those hiking more difficult trails will want to bring a pair of quality hiking boots.
Those planning intensive, multi-day hikes on some of the permit-only trails or those who want to rock climb the faces of these impressive canyons – you’ll want to do further research along with these recommendations to suit your specific needs.
For this Zion National Park Guide, here are a few of my top recommendations that will apply to most people. You can see my full list of travel gear as well as my camera equipment over on the Gear page.

Water
Bring lots of water. I recommend a water bladder that fits into your hiking bag for easy access to water throughout the hike without having to stop and take out a bottle from your bag constantly. I have a 2.5lt Osprey Hydraulics reservoir, which would be a few water bottles worth of water. But water bottles will do the trick too. Stay hydrated!
Recommendation: Osprey Hydraulics Reservoir
Hiking Bag
A good, comfortable hiking bag is important to carry your water, snacks, sunscreen, phone, and extra clothing. And in my case, camera gear too! Mine is comfortable with multiple straps to keep it in place and distribute its weight. And the Osprey water bladder fits perfectly into my Osprey Daylite Plus hiking bag, which has a specific pocket and clip designed for it.
Recommendation: Osprey Packs Daylite Plus Daypack
Sunscreen
Have I mentioned that hiking in Zion you will be under the beating sun of the Utah desert? You should probably bring some sunscreen. Especially if you’re pasty white and burn easily like me and Peter. Peter was wearing 3/4 pants and didn’t sunscreen his legs and they got burned cherry red. Apply frequently! My favorite sunscreen: COSRX Aloe Soothing Sun Cream SPF50
Snacks
Along with water, definitely make sure to bring some snacks. Long, grueling hikes with burn calories quickly and sap your energy. I recommend buying the snacks before you get to Zion as the hiking snacks you can purchase inside the park at the Zion Market are a bit overpriced (example: beef jerky that is normally $6 was $9). What we brought: Kind Granola Bars and Goldfish
Hiking Boots
Most importantly (in my opinion) is a good pair of good hiking boots. Peter and I both have the Oboz Bridger boots. These boots lock your ankles in place and provide awesome grip to help you climb the steep inclines with ease and without fear of falling off a cliff. Hiking boots are a bit of an investment but they are so, so worth it. Try to wear them a few times to break them in before your trip to Zion to avoid getting blisters.
Recommendation: Oboz Bridger Boots
Thick Socks
The last thing you want in the middle of a long hike is a blister! Make sure your feet are protected from rubbing on your boots. I layered a couple of pairs of my regular ankle socks to provide thick padding.
First Aid Kit
You can buy a premade little first aid kit (like this mini Coleman First Aid Kit), but Peter and I just grab the items we need from around the house and throw them in our bag. Especially remember to bring Bandaids, just in case you end up getting a blister despite your precautions. It doesn’t hurt to have some antiseptic or Neosporin too. If you’re clumsy like me then chances are you will fall and scrape your knee at least once. And to complete your kit – maybe some Advil or Tylenol.

Sunglasses
Again, desert = sun. You get the point. You don’t want to spend your entire day squinting and unable to fully enjoy the beautiful landscapes. Peter and I love our Ray-Bans but any good pair of polarized sunglasses will do.
Comfortable, Breathable Clothing
This is a desert after all, you will inevitably get hot and sweaty during hikes! Regardless of the time of year that you visit, make sure you have layers you can take on and off to regulate your temperature. We were visiting in early spring when the air was still crisp so I wore a light athletic jacket that I took off later in the day and put in my bag.
When to Visit Zion National Park
Avoid Holidays
If it is avoidable, I would recommend not visiting during a holiday weekend like we did. With limited time off from work to spare, we didn’t have much of a choice but to utilize our long holiday weekend for Easter. I imagine many people were in similar positions based on how very crowded the park was. A park ranger confirmed that this was much busier than usual due to the holiday. Many of the lines of people waiting for Zion Shuttles were reminiscent to the lines one would see at Disney. Peter and I joked that we should have bought a Fast Pass. Yosemite was also surprisingly crowded for Thanksgiving weekend when we visited. So if you can avoid visiting a national park during a holiday weekend, that would be in your favor.
While I would rather have the opportunity to visit when the park is less busy, I will say that it was cool to see just how many people were taking advantage of their national parks and enjoying nature’s beauty hiking and being active during their vacations. All of the money earned from visitors goes back to the protection of the park itself.
Visiting during an extremely crowded weekend is definitely better than not visiting at all! The park is nonetheless beautiful. And some of the more difficult trails will still be significantly less crowded, like our hike to Observation Point.

During the Week
Another suggestion that may be difficult to follow with strict work schedules like ours – try to visit during the week opposed to over the weekend. This will significantly cut down on the crowds. Fewer people means the trails will be more maneuverable (read on to hear about our experience at the overcrowded trails of Angel’s Landing) and picture-worthy, void of the swarms of tourists.
Off Seasons
Also aiming for off-seasons such as fall and early spring, and avoiding breaks from public schools and colleges, will help immensely. I’ve seen pictures from visitors in the fall who seemingly had the park to themselves!
According to the Zion National Park website, the busy season at the park runs from March to October and the off-season is from December through February. The weather can be preferable during this time of year, offering mild winter days rather than the arid desert heat of the summer months. While the winters are mild, keep in mind it does snow in Zion. Do your research and come prepared if you’re visiting during a snowy season. Check the weather ahead of time on the Zion NPS website.
Some additional reasons to visit during the off-season: fewer crowds, less traffic, and more available accommodation at lower prices.
Helpful Links
Zion National Park Service official website
Zion National Park Fees & Passes
Guide to Zion Shuttle System
Hikes in Zion National Park
Here is a brief look at some of Zion National Park’s top hikes. Obviously, there are many more awesome hikes available in Zion National Park, but these are just some of the most popular ones. Read on to see our weekend trip itinerary and the hikes that we were able to fit into our trip to Zion.
For a list of hikes in Zion sorted by difficulty, look at the Hiking page of the Zion National Park website.

Angel’s Landing
Distance: 5 miles roundtrip
Elevation: 1,488 feet gain
Time: 4-5 hours
Access: The Grotto Trailhead
Angel’s Landing is one of Zion National Park’s most popular and renowned hikes. Its notoriety stems from its unique and adrenaline-pumping summit: hiking over a fin-like, narrow spine of a mountain top with nothing but a chain bolted into the cliff to hold onto.
The best time to make this hike is in Spring and Fall. If you hike in the Summer, come earlier for cooler temperatures. During the Winter the trail can become icy and extremely dangerous. Those with a fear of heights should not attempt this hike!
To learn more about the Angel’s Landing hike, read Utah’s official Angels Landing Hike Guide.
Observation Point
Distance: 8 miles roundtrip
Elevation: 2,300 feet gain
Time: 4-6 hours (it took us about 4.5 hours)
Access: Weeping Rock trailhead (stop #7 on the Zion Shuttle)
Observation Point Trail is a long, strenuous hike made totally worth it by the pay off at the top: one of the most beautiful views in Zion National Park. The viewpoint has a spectacular view out over Zion Canyon and many of the major park attractions below, including Angel’s Landing. Although less exposed, the hike to Observation Point is more taxing than Angel’s Landing with its nearly 1000 feet additional elevation change.
This trail is mostly accessible year round, though Summer can be very hot.
Learn more about the Observation Point hike from Utah’s official guide, Hiking Observation Point Trail, or from Joe’s detailed Guide to Observation Point.

The Narrows
Distance: Up to 16 miles, 6-8 miles average
Time: Up to overnight (with permit), 4-6 hours average
Access: “Bottom up” starts at Temple of Sinawava (last stop on the Zion Shuttle)
The Narrows is the most popular hike in Zion National Park. The Narrows is the narrowest part of Zion Canyon. This hike takes you on a paved path and then into the Virgin River that cuts through the canyon. Depending on the water levels and how far you wish to go, you will get your feet wet and could be wading through water (you can rent drysuit/waders outside the park). The Narrows hike can be tailored to suit almost any skill level as you can hike as far as you wish before turning around.
There are several ways that visitors can make this hike. The most common is “Bottom up”, beginning at the Temple of Sinawava.
To learn more about the Narrows hike, read Joe’s comprehensive guide: Hiking the Narrows.
Make sure to check before your trip if the Narrows will be open: NPS Zion Narrows

The Subway
Permit Required!
Distance: 9.5 miles
Time: 7 to 9 hours
Access: “Top down” (most common), at the Wildcat Trailhead
The Subway hike is similar to the Narrows, hiking through a slot canyon, but even more difficult and technical. You are required to climb and scramble over boulders and even swim! Only attempt this hike if you are an experienced hiker or canyoneer. Make sure to do your research and get detailed trail information beforehand. A permit is required to do the Subway hike. Permits can be obtained at any Visitor Center. This hike is definitely on my bucket list.
Learn more about the Subway hike on Utah’s official Hiking the Subway guide.
Like the Narrows, make sure to check before your trip if the Subway will be open: NPS Zion Subway
Our Weekend Trip Itinerary
Day 1
Friday, the official Day 1 of our trip, was a travel day. The drive from Southern California to the area of Zion in Utah took us about 8 hours with traffic and overshooting our hotel. We drove all the way to the Quality Inn in Springdale before realizing that the Quality Inn we were staying at was actually 30min back in Hurricane. Oops!
Tip: We found that hotels in Hurricane are quite cheaper than the ones directly in Springdale during the busy seasons if you are willing to make the 30min drive to save some moolah.
No matter how you’re getting to Zion, it’s good to keep in mind traffic and plan ahead for it. Especially if you’re visiting over a holiday weekend like us. After finally arriving around 10:30pm, we went to bed. We had a long day of hiking planned ahead of us!
Day 2
This was going to be a long day. As our only full day to hike and enjoy the wonders of Zion National Park, we knew we had to make the most of it. We arose as early as we could, gobbled up the complimentary hotel breakfast, and hit the road towards Springdale. After the 30min drive we parked at the Bumbleberry Inn (me and Peter’s hotel for that night) and caught one of the first free Zion shuttle buses into the canyon.
Tip: The first shuttle into the canyon is at 7:00am. Even this early in the morning, the bus was packed and the entrance to the park had a long line of visitors. Check out this Guide to Zion Shuttle System.

Angel’s Landing
Crowds
As perhaps the most popular hike in all of Zion, we should have known it would be busy. But it was a madhouse. Ok, maybe I’m being a bit dramatic. We had planned to go straight to Angel’s Landing at the beginning of our day to potentially beat some of the crowds and that had not been our luck.
Tip: Although the inescapable crowds that we faced were probably because it was a holiday weekend, I would still recommend trying to go early to miss them for your own visit to this popular hike!

Walter’s Wiggles
Walter’s Wiggles is the portion of the trail that zigzags up the side of the mountain at a sharp incline. It’s made up of 21 switchbacks, to be exact. This is a whole lot of incline, back and forth up the side of the canyon. Definitely make sure you have your thick socks on and bandaids at the ready – the backs of my feet inevitably got blisters after all the rubbing from my boots.
After the grueling incline up Walter’s Wiggles, we arrived at Scout Lookout, a nice viewpoint before the famous chain-aided hike along the ridge to Angel’s Landing viewpoint.
Scout Lookout
Full disclosure: Because of the crowds, we only ended up doing the first 80% of the Angel’s Landing hike. We went up Walter’s Wiggles to the Scout Lookout, at the beginning of the “Hogsback” leading to Angel’s Landing Summit, where we stopped.
It was just too crowded along the narrow ledge of the Hogsback to navigate the chain to get across it and actually enjoy the hike. Talking to other hikers on their return journey from the viewpoint, they told us how dangerously crowded the tight path was – to the point where they literally had to hug hikers trying to pass in the opposite direction. We could see the two distinct rivers of people, one entering and one returning along the narrow path. No thank you! People have died on this very path and it isn’t worth the risk. We agreed we would have to return someday during a less crowded weekend to reattempt the remainder of this hike.
The view at Scout Lookout was beautiful. We sat right on the edge of a steep cliff (that was full of other people sitting on the rocks like us, also unable or unwilling to continue to the final viewpoint because of the crowds). It’s hard to tell because we didn’t have a wide-angle lens, but in the photo below I was literally sitting on the edge of a cliff! On the other side of that rock was a sheer drop. It was a little nerve-racking!

Hike Back Down
By this time it was like midday, we decided we needed to move onto the Observation Point Trail so that we would have enough time to complete it. So we made our way back down Walter’s Wiggles, which was much faster and easier than going up was.
If you’re luckier with the crowds than we were and want to plan for the entire hike, here’s Utah’s official Angels Landing Hike Guide.
Observation Point Trail
This hike kicked our ass. A few days later and my muscles were still sore. But I would do it again in a heartbeat for those incredible views. This hike was without a doubt the highlight of our weekend in Zion for me and my favorite hike from this Zion National Park Guide. I would definitely recommend it! While it is a longer, more difficult hike than others, this means that it is less crowded. And it is all worth it to reach the highest viewpoint in Zion and arguably the best view in all of the park.
Echo Canyon
Along the climb to Observation Point, the trail takes you through Echo Canyon. Here the temperatures are cooler and gave us a short relief from the hot midday sun. You also get a glimpse at the shadowed slot canyon sections of Echo Canyon. This was probably my second favorite part about this hike besides the obvious final viewpoint.


Observation Point Summit
Right before we made it to the summit, on the final leg of the upward climb, Peter and I encountered a mountain goat! I managed to get some shaky video, but it didn’t do this incredible moment justice. The mountain goat bounded across the path in front of us without care and then watched us suspiciously from the rocks above. He was a beautiful creature.
By the time our group made it to the top of the mountain and reached the iconic Observation Point, we were all exhausted. Some of us had a few new blisters to show for it. But it was entirely worth it.
The Observation Point viewpoint sits high above Zion Canyon at the top of a mountain. It was actually eerie to be hiking upwards, seeing the rocks still high above your head for so long, to suddenly reach the top and have there be nothing above you. It felt like we were on top of the world.

Hike Back Down
This is a roundtrip hike that takes the same trail back down as the one that you come up on, so you know exactly what to expect. However, the downhill experience on this hike was definitely different than going up. Climbing up this long trail of steep inclines versus going down it uses different muscle groups. And there is more impact on your feet, joints, and knees. So while going down is easier than going up, it is still a serious workout. By the time we returned to the trailhead, we were ready to drop.
Dinner at Zion Brewing Company
Just outside the pedestrian entrance to Zion National Park are a few apparel and souvenir shops, markets, and Zion Brewing Company. We were all starving after our day of relentless hiking. So we put our name on the waiting list and rested our aching bodies on the benches outside the brewpub until we were called in.
Even though we were all exhausted, it was a fun “last supper” together before the rest of the group had to leave. Dinner was full of laughter, reflecting on the day’s events. I ordered a hearty bowl of meat and potato soup to fill my ravenous appetite. Despite it being a brewery, I am not much of a beer drinker and opted for a glass of wine. After tasting Peter’s sour beer I wish I had ordered that though! Peter and I ended up picking up a growler of the sour beer to enjoy to ourselves that night.
Sunset in Springdale
Peter and I had hoped to get photos of a beautiful sunset as a timelapse over the red cliffs surrounding our hotel in Springdale. Unfortunately, the evening had grown cloudy. The murky grey skies blocked the rays of golden hour light we had anticipated, but that didn’t stop us from going out and taking some pictures. We even took the opportunity to fly the drone a bit before the last bit of daylight escaped us.
As expected, this had been a long day. For those with FitBits or similar step counters, I ended Saturday with a personal record-breaking 45,000+ steps! Equivalent to about 17 miles walked that day. We ended the night by strolling around the little town of Springdale and picking up some chocolate at the adorable candy shop. Although we had planned to enjoy our hotel’s hot tub and swimming pool, when we returned we crashed in bed immediately into a deep sleep.
Day 3
Sunrise in Springdale
It felt as though I had hardly closed my eyes for a moment when my alarm was already ringing the morning of our final day in Zion. We had set it early (the sky was still dark outside our window) in hopes of catching the sunrise.
Half asleep, we packed our camera bag and trekked to the spot we had scoped out the night before. I set up both my DSLR and point-and-shoot cameras in different directions – I wasn’t about to miss this. And then we waited. But counting on one morning to get the perfect shot is generally a recipe for disaster. The sky was grey with a blanket of clouds – Wasn’t this supposed to be a desert? Behind the clouds, we could see the illuminated dot of the sun slowly rise without any of the beautiful pinks and oranges we had hoped for. Alas. At least we might have some interesting cloud timelapses.
Tip: If you’re hoping to photograph a beautiful sunrise, I would suggest having multiple days to work with if at all possible to better your chances.
After packing up our gear, we took our breakfast vouchers from the Bumbleberry Inn over to their adjoining restaurant, Porter’s Smokehouse & Grill. We both ordered a classic breakfast of eggs, toast, and meat of our choice. The perfect thing to fuel another day of hiking. With full stomachs, we packed up our things, checked out of the hotel, and head over to the park for a few hours of hiking before we had to depart.
The Narrows
With our meager handful of hours left to explore Zion National Park, we had decided to get a taste of the Narrows. Unfortunately, it takes a full day to complete the entire 10-mile hike up to Big Spring so we knew we would only be able to enjoy a glimpse of what this trail really has to offer.
The Narrows is one of the most well-known and traversed trails in the park, so it came as no surprise that it was busy when we arrived. Especially after the crowds we had already experienced during this holiday weekend trip.


You Will Get Wet
Be prepared: Your shoes will get soaked through and you will get wet because you are literally hiking through a river.
Many of the visitors planning to do the hike had rented the rubber boots/pants and walking sticks from outside the park in preparation for this hike. (You can also rent the needed gear from Zion Adventure Company in Springdale). However, since we would only be doing a small portion of the hike before leaving we couldn’t justify the cost.
Onward we trudged, too engrossed in the beauty of our surroundings to be put off by the cold water or our wet hiking boots anyway. This hike was made for Peter and his love of “clomping” around in rivers. I can’t wait to come back to this amazing canyon trail someday to do the complete 10 miles roundtrip hike.
Note: After returning home we set our boots out in the sun to dry and they were just fine.

Drive Home
Holiday Weekend Traffic
The drive home was even slower than the drive to reach Zion. The traffic was heavy and moved at a crawl for much of the drive, likely from all the Easter Sunday holiday goers returning home like us.
Despite leaving the park around 1:30pm, we didn’t reach our apartment in Costa Mesa until nearly 11:00pm. The one highlight of the drive was the beautiful sunset the Arizona desert gave us. We were whipped from the weekend full of strenuous hiking and the long, grueling drive home. Without any attempt at unpacking, we immediately collapsed and went to sleep. The next day, and for a couple days after, both of our entire bodies were sore. But it was so worth it.
Next Time
All too soon, our time in Zion had come to an end. Once again we vowed we would return to this magical place. A weekend trip was perfect to get a few hikes in and soak in the beauty of this majestic park, but I could easily spend weeks here.
Next time we will come (hopefully) during the week and not during a holiday, when the crowds would likely be less and allow us to complete the famous Angel’s Landing hike. And give ourselves the full day required to do the entire Narrows hike. Maybe we will even attempt to get a permit to take on the more-intense Subway hike. I want to do it all!
Any tips to add to this Zion National Park Guide?
I highly recommend visiting Zion National Park if you have the opportunity. Zion National Park was America’s 3rd most visited park in 2017 for good reason. While smaller than other parks such as Yosemite, it more than makes up for it in its surreal landscapes and magnificent hiking trails through twisting canyons and river beds.
If you enjoyed this Zion National Park Guide and weekend trip itinerary, share it with your travel buddy using the social media buttons. Or save it with one of the Pinterest images below and start planning your own trip to Zion! Thanks for stopping by my blog.
Have you ever been to Zion National Park? What was your favorite part of this beautiful park? Or are you planning your first trip to Zion? Tell me in the comments below!
Pinterest images